Everyone and their mother has seen a wreath of ribbon hanging on a door, but have you ever wondered how they are made? You probably just assumed that they bought it like that, but generally, that isn't the case. This is a very common DIY (do-it-yourself) project that can be customized for each event/season. In lieu of this, here's how to make a deco mesh wreath.
WHAT YOU WILL NEED:
- Wire wreath form (shape of your choosing)
- Pipe cleaners (color of your choosing)
- One wide roll of deco mesh
 |
| http://www.clumsycrafter.com/wp-content/uploads/2012/03/howtomakedecomeshwreath2.jpg |
STEP ONE
Start by twisting pipe cleaners onto the entire wreath frame about 1 1/2 inches apart. Set any extra pipe cleaners to the side because you might need them later.
 |
| http://www.clumsycrafter.com/wp-content/uploads/2012/03/decomeshwreathdiy5.jpg |
STEP TWO
Pinch the ends of the mesh together and tie it down to the wreath form by placing it in the middle of a pipe cleaner and twisting the pipe cleaner closed.
STEP THREE
 |
| http://www.clumsycrafter.com/wp-content/uploads/2012/03/decomeshwreatmake4.jpg |
Now pull the mesh out about 5 or 6 inches from the twisted pipe cleaner and gather it together with your hands. Find the next open pipe cleaner and place the pinched piece into the pipe cleaner and twist. This will make a natural little bubble of Deco Mesh
.
 |
| http://www.clumsycrafter.com/wp-content/uploads/2012/03/decomeshbabywreath6.jpg |
STEP FOUR
Keep going always trying to use the same length of Deco Mesh and attaching it to the wire frame with the pipe cleaners.
 |
| http://www.clumsycrafter.com/wp-content/uploads/2012/03/wreathtutorial8.jpg |
STEP FIVE
Eventually your wreath will start to look like this.
 |
| http://www.clumsycrafter.com/wp-content/uploads/2012/03/meshwreath10.jpg |
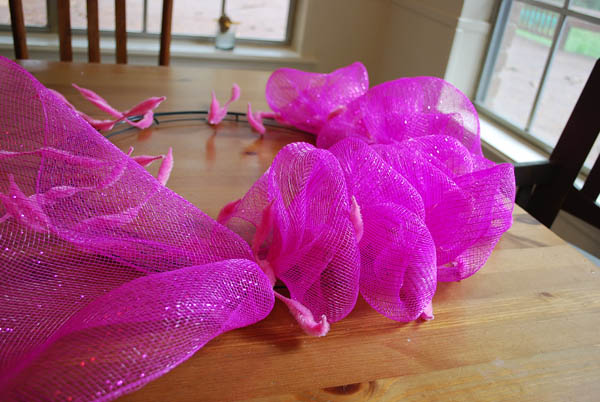
STEP SIX
If you repeat this process all the way around the frame of the wreath, it will look like this.
 |
| http://www.clumsycrafter.com/wp-content/uploads/2012/03/decomeshwreathpink11.jpg |
For a more fuller look, add more pipe cleaners in any empty place on the wreath frame and do a second layer using the same technique of a mix of old and new pipe cleaners.
STEP SEVEN
 |
| http://www.clumsycrafter.com/wp-content/uploads/2012/03/girlbabyshowerdecomesh12.jpg |
Finish by curling the end of the deco mesh into itself and attaching it with pipe cleaner so you won't see any raw edges. This is the finished wreath with two rows of deco mesh. A hand-painted letter "P" and light feathers applied with clear drying glue finish it off.
This particular example was made for a baby shower, but the wreath can be made for any occasion, all depending on the colors and decorations you choose. Instead of doing two layers of the same color, try two different colors. Alternate orange and black for Halloween, and maybe top it off with some spooky decorations for the season.
 |
| http://www.redesignrevolution.com/wp-content/uploads/2012/10/Etsy-Wednesday-Halloween-Wreaths-6.jpeg |
No comments:
Post a Comment